Friday, 29 April 2011

Congratulations, Will & Kate!


Today will bring the long-awaited, much-written-about and souvenir-industry-boosting wedding of Prince William of Wales to Kate Middleton. I wish them all the best and hope their marriage will be a happy one and withstand public scrutiny. At least, I imagine, in their circles they will not have to argue about who's turn it is to take out the trash...

Amongst my favourite items of wedding memorabilia are various Royal Wedding tea towels, from their more kitschy traditional incarnations down to the fresh new takes by some cool graphic designers. Here are a few that I particularly liked. Click the links below the images for sources.


Fancy a souvenir towel of your very own for your nuptials? You might want to have a look here.

As today will also bring Marco's and my return to London from our honeymoon, I do hope the tube will be running okay, what with all the flag-waving people and potential security issues...

© Annika - All The Live Long Day (unless otherwise stated)

Thursday, 28 April 2011

What's Not To Love: Young House Love

I initially stumbled across Young House Love when I was googling for wedding inspiration and found Sherry's and John's post about their own backyard wedding. Not only did I love their relaxed party and hilarious style of writing, but also the fact that they were doing up a house the DIY way, just like Marco and I. Only with much more gumption. I have been following their extremely successful blog ever since, witnessing its name change, the sale of their first house and the birth of their daughter Clara.

If you care to take a look, you will be impressed by what two people can achieve, you will chuckle while reading most of their posts, and you will meet Burger, the cute chihuahua.  But most of all, you will find loads of tips on DIY projects, small and big. Thanks, Sherry and John, for sharing with the rest of us!


© Annika - All The Live Long Day (unless otherwise stated)

Wednesday, 27 April 2011

London On A Good Day


© Annika - All The Live Long Day (unless otherwise stated)

Tuesday, 26 April 2011

On Wedding Websites

Apparently, there are web designers that will charge a fee for building you a wedding website. Good on them and on the people with the money. Alas, there are also a lot of online companies that let you pick a great design and display your content for absolutely nothing!

Marco and I used mywedding.com. You can sign up for a free account and will get a password protected wedding website. You can choose your favourite design from a variety of different templates. We chose "Fun Dotty Border". You can then really customize your wedding site as much as you want, display your own choice of pages, upload photos or publish news. All this can be shared with your family and friends, who can also wish you well in your online guest book

For example, we posted all the details for our wedding venue, informed people about etiquette requirements for the registry office, made albums of our life together, left travel tips & suggested activities for our out-of-town guests and listed some fun facts about each other. You can see a few screen shots below.

I think having a website is a great way of involving your guests in your preparations, especially if a lot of them are traveling from further away to attend your big day.

With mywedding.com, your site will stay up as long as you like, so you can even display your wedding pictures or give people updates on your married life, which I think is pretty cool.

In addition to hosting your wedding website, mywedding.com also is a valuable resource for your wedding planning, with links to vendors (USA only), invaluable wedding tips, and a blog for even more inspiration.

Obviously, this provider is not the only option. If you just go and google "free wedding website", you will see how many more alternatives there are.


© Annika - All The Live Long Day (unless otherwise stated)

Monday, 25 April 2011

My Local Craft Fair


Are you tired of Easter yet? Do you miss me? Do you want to go to this event with me in May?


© Annika - All The Live Long Day (unless otherwise stated)

Friday, 22 April 2011

Easter Greetings


Good wishes to you and yours for a very Happy Easter!

Have a lovely holiday, I hope the weather is fair and your egg search will yield plenty of chocolatey goodness!

xxx


© Annika - All The Live Long Day (unless otherwise stated)

Thursday, 21 April 2011

Easter Cupcakes


If you are up for some last-minute sweet Easter baking, why don't you give these Martha Stewart Nesting Baby-Bluebird Cupcakes a try. Or maybe you would rather have Truffle-Filled Chocolate Cupcakes, decorated with Cadbury Mini Eggs?


I made both kinds two years ago and took them to my friend Christina's house for Easter brunch. I carried them on a tray that was wrapped in clingfilm and took them on the tube and train like that, cupcakes in full view. You would not believe how many people ogled my cakes. I even got chatted up by a nice lady at Victoria station because of these.

Proud? Me?! I loved it!


Are you getting excited for Easter? How do you celebrate it, if at all? Have a great day!

x

© Annika - All The Live Long Day (unless otherwise stated)

Wednesday, 20 April 2011

Easter Bread

Even though I'm THRILLED to be traveling in Madagascar right now, it kinda blows to miss out on everything Easter this year. I'm such a kid when it comes to Easter or Christmas. I love the treats, the decorating, and the cooking that go along with these holidays.

This is a picture of my breakfast table from last year's Easter Sunday, with the traditional German braided Easter Bread stealing the scene. This bread was baked by my Mama every Easter as long as I can remember, and I am continuing the tradition in my house. It's a sweetish white bread, similar to brioche. We always put our coloured, hard-boiled eggs in the middle like you can see. I am sharing the recipe below. Make it the night before your big breakfast if you do not want to get up early to bake. I have not tried letting it rise in the fridge over night, but I am sure that would be possible, too. If you love jam or Nutella, this bread will become your friend real quick.


TRADITIONAL GERMAN EASTER BREAD

Must Have:

600-650g plain flour
7g fast action dry yeast
40g unrefined granulated sugar
1 tsp salt
400 ml milk, plus extra for brushing
30g melted butter, cooled
vegetable oil for covering

Must Do:

In a big mixing bowl or the bowl of your freestanding mixer, combine 550g of the flour with yeast, sugar and salt. Make a little crater in the middle.

Heat milk on the stove or in the microwave till just lukewarm (if you stick a finger into the milk, it should feel the same as your body temperature). Combine milk and melted butter.

Add liquids to the dry mixture gradually, and knead until well combined and dough feels soft and elastic. You can do this using the kneading hook of your mixer, if applicable.

Turn the dough out onto a work surface that is dusted with 50g flour. Knead and incorporate the flour, adding up to another 50g, until the dough no longer sticks. Then knead for 10 minutes, stretching the dough, until it becomes shiny and smooth. If using a mixer, add as much flour as needed to bring the dough together and knead on low speed until you reach the shiny and smooth stage.

Shape the dough into a ball (take it out of the mixer bowl to do this, if using mixer). Cover dough ball lightly in sunflower, rapeseed or similar light vegetable oil. Place in a clean bowl, cover with clingfilm or a clean dish towel and let rise in a warm place until double in size (about an hour).

Knock the dough together and knead once more, a few strokes only. Divide the dough into thirds.

Shape each third into a string, each about 50cm long. Braid these strings and form a circle, tucking the ends of the braid under each other. Place on baking sheet that has been greased or lined with silicone, cover and let rise again, for about 30 minutes.

Preheat the oven to 200°C.

Brush the bread with a little milk and bake for about 50 minutes or until it reaches a golden brown colour. It will be done when you tap its bottom and it makes a hollow sound.

P.S.: You could sprinkle some sliced almonds over the top of the bread before baking, if you fancy.


© Annika - All The Live Long Day (unless otherwise stated)

Tuesday, 19 April 2011

What's Not To Love: Tiny Happy

I do not quite remember when I really started reading blogs. It was maybe about 2 years ago that I discovered there was a community of creative people out there, willing to share their work and being generally inspiring.

Nor do I remember how exactly I became a faithful follower of Tiny Happy, but I do remember that it was this post about a bathroom that drew my attention one day. I loved the delicate look of the curtains, which the owner of this blog had personalized with lace doilies.


The lady behind Tiny Happy is called Melissa. Day to day, you will find her writing about her crafts. Like embroidery, sewing, drawing, painting. Melissa has a passion for re-using vintage fabric and thrift store finds, creating beautiful new items from old and discarded things. In her original art, she uses a range of sweet and delicate flower or plant-inspired motifs. A nature theme runs through all her work. She is generous with her knowledge and offers many tutorials on sewing and making things.


Sometimes, Melissa also writes about her life and her treasures, her family and her friends. She is very good at taking evocative pictures of the world around her and she shares recipes on occasion, which always seem to be for the kind of wholesome baked goods that you would want a friend to make for you to get you over a bad day. 


For all I know, this blogger has a very kind soul. This becomes apparent in her writing, her attention to detail, and also when she sends friendly replies to people like me who ask if they can blog about her. Thank you, Melissa, for sharing your creativity with me and your other readers.

You can see more of Melissa's work on Tiny Happy and in her Tiny Happy Shop on Etsy, if you would like to have a look.

All photos © Melissa - Tiny Happy

Monday, 18 April 2011

Guide On How To Make Free Space And Free Money

It's easy! Spring clean your wardrobe with the help of eBay! That's exactly how I earned some desperately needed closet space and just over £130 last month.

These are a few things I learned from the experience:

1) Your bedroom may look like this for the better part of two weeks.


2) I really hadn't done much ironing in years.

3) In my 20s, I loved pink and sparkles.

4) Now, in my 30s, I prefer bold prints and strong colours.

5) I will never learn to love emergency purchases.

6) Don't hang on to clothes that you think may fit you again after you lost those 15 kilos.

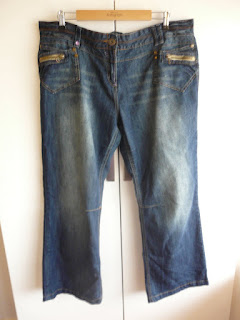
7) Jeans that do not flatter your figure do not have a place in your life.

8) People will buy anything. Almost.

9) The nice folk at the post office will start recognizing your face if you go to see them every day, for 10 days.

In addition to the invaluable insight into my life in fashion, I would also like to tell anybody who is thinking about auctioning off some of their unwanted clothes about what may help to make them attractive to buyers. I think some of these tips would also apply to any other junk that may turn out to be somebody else's treasure.

1) Tackle your wardrobe and remove anything that does not fit, or you do not like wearing. Shoes, clothes, accessoires, ANYTHING. Go over the pile and sort out stuff that is in too poor a state to sell with a clear conscience. This might be because it's washed out, has gone baggy or there are just too many scuffs on it. Don't through these things out, though, donate them to charity. Somebody who has no shoes on their feet or needs a warm sweater may still appreciate them.

2) Check for any repairs that the garments you will sell may be needing, and mend anything that you can.

3) Get out your ironing board and iron every single item of clothing that does not look close to pristine. When you take your pictures, every crease will show! Polish shoes, fluff sweaters, de-fuzz.

4) Find a nice, bright spot where you can take photos of your auctionees. Display them on a nice hanger or a dressmaker's dummy, if you have one. Try not to use the flash, as this might distort colours. Take pictures from the front, the back and of any detail you think makes the garment special. If you are selling bags, show the inside of them. If you are selling shoes, show the insides and the soles, so that a buyer can see if they are worn a bit or in pristine condition.

5) List your items. If you stick to a starting price of below £0.99, listing an item with pictures will be free. I started a few of my things off at only £0.10, because I just wanted them to go to a new home quickly. A low starting price also encourages bidding.

6) Describe the clothes you are selling as thruthful and as detailed as you can. If they have faults you were not able to fix, tell your potential bidders about these, including a photo where possible. If you have only worn a dress once, let them know. Mention the brand, as a popular one may make your listing more attractive. I found that Monsoon and Next were like nectar to the bees. Also point out if you live in a smoke and/or pet free home.  Honesty goes a long way when it comes to avoiding disputes and disappointment, and a bit of positive touting never hurt anyone.

7) Don't go and make money on your postage. Try and weigh things in order to be able to give people a realistic estimate. It's okay to top up your estimate a little to make up for packaging costs and your time, but don't be outrageous about it. I used the Royal Mail Price Finder to help me with this.

8) Set the end of your auction to be in the evening or on the weekend, when people are more likely to be in front of their computer and do some last minute bidding.

9) Keep checking your emails for potential questions from buyers. Try and answer these questions as quickly as possible. Apologize if you have taken your time to answer. If you can give somebody the measurements they need, calm any worries they might have or tell them how much it will be to post to Timbuktu, they are more likely to decide on bidding.

10) After an auction has ended successfully, and you have recieved payment, let the buyer know when you will be posting their purchase. I always find it reassuring to know that an eBay seller is on top of their game and that I can look forward to a parcel. If buyers take their time to pay you, you can give them a little nudge after 3 days or so, they might have just forgotten.

11) Give positive feedback where positive feedback is due. If you feel less than positive about a transaction, try and sort it out before leaving somebody negative feedback. In return, if somebody did not like what you did for them, try and investigate why. Maybe the issue can be resolved (especially if it was a case of somebody's child playing with their keyboard) and they will revise their feedback. If you do not hear from people at all, contact them and ask them if everything was okay and if they might care to leave you positive feedback. After all, feedback is what advocates your virtue to the eBay community, and you want to look your best.

12) Enjoy the fruit of your labour, but don't go and spend the money on clothes! Wink, wink....

Finally, here are some of the things I managed to sell, and for how much I managed to sell them.


Dorothy Perkins Skirt.
Liked, but will never fit again.
Sold for £6.27.


Next Sleeveless Linen Blouse.
Emergency party outfit. I do not even like to wear sleeveless. Or linen.
Sold for £6.70.


Monsoon Tea Dress.
Kinda nice, but made me look matronly.
Sold for £16.00.


George at Asda Slouch Jeans.
Look horribly on me.
Sold for £8.50.


Next Cotton Shrug.
Came as part of an ensemble. Don't like to wear shrugs.
Sold for £6.10.


Nightie.
Size 14. Who am I kidding.
Sold for £2.55.


 Monsoon Silk Dress.
Worn once to wedding. Beautiful, but would make people offer
me their seats on public transport.
Sold for £24.44.


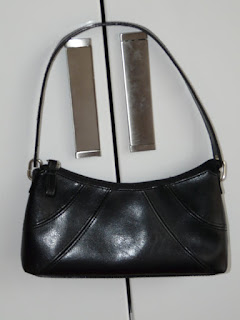
Small Shoulder Bag.
Ages old, no longer really my style.
Sold for £0.50.


M&S Trench Coat.
I think I wore it twice, just before I went from nice & skinny to quite a bit overweight.
Sold for £2.20.


Brown & Yellow Belt.
Came with a pair of jeans. Didn't really like it.
Sold for £0.10.


© Annika - All The Live Long Day (unless otherwise stated)